Login
Login
Winner's Excogitations
A chronicle of the thoughts, learning experiences, ideas and actions of a tech junkie, .NET, JS and Mobile dev, aspiring entrepreneur, devout Christian and travel enthusiast.
GIT - For The Absolute Beginner (Part 3 aka the Finale)
GIT - For The Absolute Beginner (Part 3 aka the Finale)

This is the third part of a series that aims to take the reader from zero to hero when it comes to using the Git version control system. Part 1 covered the various git commands and their usages. Part 2 was a step by step tutorial on setting up a local git repository, adding files to tracking and pushing to GitHub. In this part, we’d deal with creating branches, merging branches, rebasing and fixing conflicts.
NOTE: This is a continuation of the work done in part 2, so if you haven’t gone through that, endeavour to do that.
Branching
What is branching in git? In its most basic form, branching is the process of creating a copy of the current state of your project so that you can make changes without affecting the original state. Let’s say, for example, you are working on a website and you are done with the design. Your supervisor comes in and asks you to change the login button to bright pink with a unicorn as the icon. You wouldn’t want to make the requested changes to the files directly as that would mean the site would be unavailable till you’re done making the changes, this is where branching comes in handy. Since a picture is worth a thousand words, here is an image showing what branching is courtesy of Atlassian.
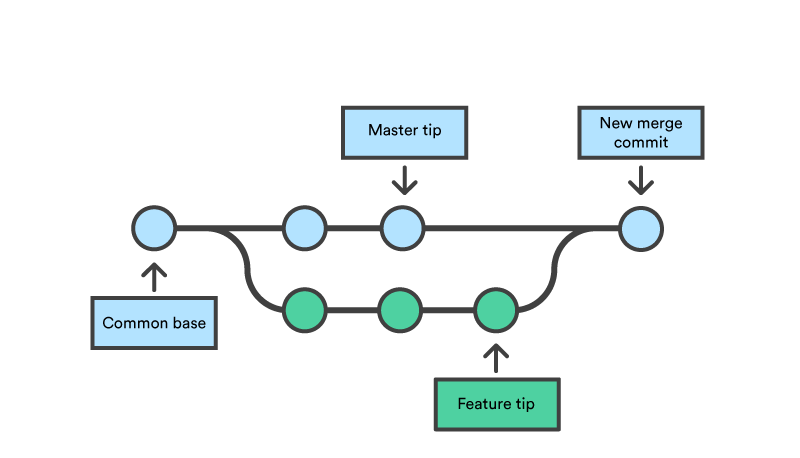
In the infographic above, the purple (little feature) and green (big feature) lines are branches of master (the blue line). Whatever changes are made in the branches do not affect the master branch. As an aside, throughout this tutorial, we would be mentioning the master branch a lot, the master branch basically is the main branch or the branch from which all other branches can trace their source.
In part 2 of this tutorial series, we added three files to the master branch of our repository. The index.html, script.js and styles.css files. Going with the example we laid, let's say I am to add a pink button with the unicorn icon. I would create a feature branch using the following command
git branch new-login-button
this creates a branch named new-login-button and it would contain an exact copy of the code in the master branch. To switch to the spanking new branch we just created, we use the following command
git checkout new-login-button
we proceed to make the changes we need to the index.html and styles.css files as we see fit.
Place this in the HTML file:
<html>
  <head>
    <title>Git Workflow</title>
    <link rel="stylesheet" type="text/css" href="./styles.css" />
    <script src="./script.js"></script>
  </head>

  <body>
    <button class="btn">
      <img src="./unicorn.png">
      <br/>
      LOGIN
    </button>
  </body>
</html>
Place this in the CSS file:
.btn {
  width:170px;
  height:95px;
  color:black;
  background-color:rgb(242,84,110);
  font-size:18px;
  font-weight:bold;
  border-radius:8px;
}

img {
  height:35px;
  width:35px;
}
Next, we have to add the files to tracking by using the following command:
git add .
Next, we commit the changes using:
git commit -m "add pink button with unicorn logo"
Merging
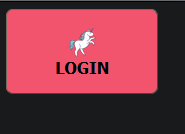
Even as branching is creating a copy of the branch you are on so you can make changes, merging is the process of bringing the changes you have made back into the root branch. Continuing with the example we are working with, I created the button as instructed by my supervisor. This was my output:
Lets say that after review, my supervisor is elated with my super awesome unicorn button and approves its depeloyment. This means my work has to get to the master branch from the new-login-button branch we created earlier. This is where merging comes into its own. We would run two commands, one to switch to the master branch, the second actually merges the changes:
git checkout master

git merge new-login-button
Other useful commands
To retrieve the latest changes on your remote repository, you run the following
git pull origin "<branch-name>"
To push your local changes to your remote repository, you can run:
git push origin <branch-name>
Summary
While this series has not been exhaustive, I trust that we have covered the often-used commands in the Git world.
Share on:
My Journey into the belly of the beast. (A tale of learning Xamarin Forms)
A quick explanation of my decision to pick up Xamarin Forms
What Is Your Intellectual Process?
A challenge to people to think


Comments