Login
Login
Winner's Excogitations
A chronicle of the thoughts, learning experiences, ideas and actions of a tech junkie, .NET, JS and Mobile dev, aspiring entrepreneur, devout Christian and travel enthusiast.
Create A URL Shortener With ASP.NET Core and MongoDB
6 years ago · 6 minutes read

What is a URL Shortener
A URL Shortener as Rebrandly would out it is "a simple tool that takes a long URL and turns it into whatever URL you would like it to be". And that is all there is to it. A URL Shortener takes a URL, usually, a long one and converts it into a shorter URL.
Why use a URL Shortener
Using a URL shortener comes with a number of advantages:
- In creating shorter URLs they are more easily remembered.
- The shorter URLs allow for links to be shared via social media platforms that have hard text limits such as Twitter.
- For a number of commercial shortening services, you can track clicks and view compiled data on each generated link.
- Shortened URLs usually just look "better" or more aesthetically pleasing if we want to get technical 😄
Scope of this article
The aim of this article is to demonstrate interfacing with MongoDB using the first party Mongo client library as well as optimizations we can add to boost the performance of our application.
Technologies
If the title of the article was not a dead giveaway, we would be employing the following technologies:
- .NET Core (Runtime)
- ASP.NET Core (High-performance web framework)
- MongoDB (Document oriented NoSQL database)
- Mongo Client (Official MongoDB client library for .NET)
- ShortId (Short URL-safe id generator for .NET)
Prerequisites
To adequately follow this guide, you would need two things installed and running on your local machine
- The .NET Core SDK, if you do not have it installed, you can follow the installation instructions here
- The MongoDB Database Server, if you do not have it installed either, you can get the community (free edition) from here
Setting up
First, we create our application folder by running
mkdir url-shortener
Next, we change directories by running
cd url-shortener
Next, we create a new ASP.NET Core project
dotnet new mvc
The line above creates a new MVC project. You can choose to use classic Razor pages or any other SPA framework offered by the CLI. To see the scaffolded app in action, you can run
dotnet run
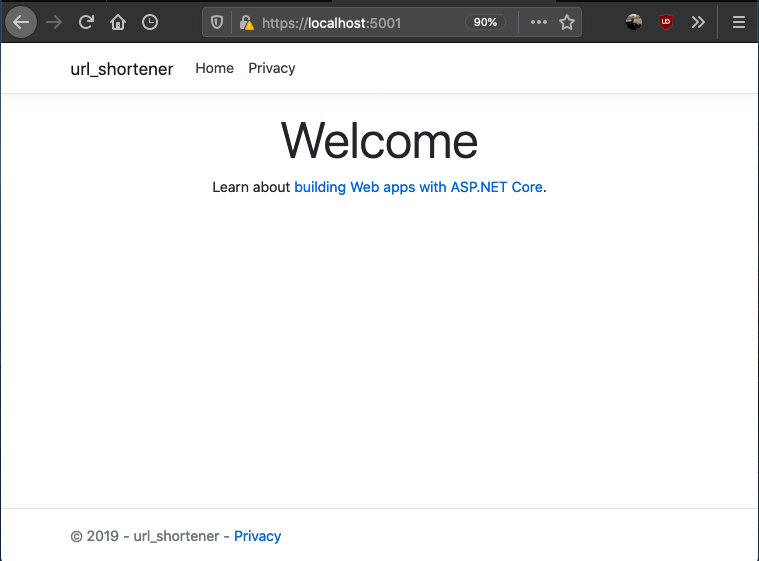
if everything works as expected, your application should be running on http://localhost:5000 and if you visit the url you should see
Setting the server up
At this point, you can open the project up in your favourite code editor or Integrated Development Environment. For some, it is VSCode, Visual Studio, Sublime Text, or Atom (I don't judge). For me, the IDE of choice is JetBrains Rider.
You should have a folder structure similar to that shown below
Next, we install the packages we need to get our service up and running
dotnet add package MongoDb.Driver
dotnet add package shortid
Next, we want to create our data model. First off create a directory named Models and a class file named ShortenedUrl.cs and add the following details
using MongoDB.Bson;
using MongoDB.Bson.Serialization.Attributes;

public class ShortenedUrl
{
   [BsonId]
    public ObjectId Id { get; set; }
    public string OriginalUrl { get; set; }
    public string ShortCode { get; set; }
    public string ShortUrl { get; set; }
    public DateTime CreatedAt { get; set; }
}
Next, we set up Mongo database in our controller. In the HomeController add the following
using MongoDB.Driver;

...
public class HomeController: Controller
{
        private readonly IMongoDatabase mongoDatabase;
        private const string ServiceUrl = "http://localhost:5000";

        public HomeController()
        {
            var connectionString = "mongodb://localhost:27017/";
            var mongoClient = new MongoClient(connectionString);
            mongoDatabase = mongoClient.GetDatabase("url-shortener");
        }
}
In the case above, url-shortener is the database name given and it can be changed to anything else. The next step for us is to create a controller method that would take in the long url and generate a short URL. This particular method checks the database first and then if the url has not been shortened before then we shorten and generate a URL.
using MongoDB.Driver.Linq;
using shortid;
using url_shortener.Models;
...
public class HomeController : Controller
{
        ...
        [HttpPost]
        public async Task<IActionResult> ShortenUrl(string longUrl)
        {
            // get shortened url collection
            var shortenedUrlCollection = _mongoDatabase.GetCollection<ShortenedUrl>("shortened-urls");
            // first check if we have the url stored
            var shortenedUrl = await shortenedUrlCollection
                .AsQueryable()
                .FirstOrDefaultAsync(x => x.OriginalUrl == longUrl);

            // if the long url has not been shortened
            if (shortenedUrl == null)
            {
                var shortCode = ShortId.Generate(length: 8);
                shortenedUrl = new ShortenedUrl
                {
                    CreatedAt = DateTime.UtcNow,
                    OriginalUrl = longUrl,
                    ShortCode = shortCode,
                    ShortUrl = $"{ServiceUrl}/{shortCode}"
                };
                // add to database
                await shortenedUrlCollection.InsertOneAsync(shortenedUrl);
            }

            return View(shortenedUrl);
        }
}
Next, we have to support redirecting to long URLs when the short URL link is entered into the address bar. And for that, we add an override to the default Index route that supports having a short code. The implementation for that controller endpoint is as follows
        [HttpGet]
        public async Task<IActionResult> Index(string u)
        {
            // get shortened url collection
            var shortenedUrlCollection = _mongoDatabase.GetCollection<ShortenedUrl>("shortened-urls");
            // first check if we have the short code
            var shortenedUrl = await shortenedUrlCollection
                .AsQueryable()
                .FirstOrDefaultAsync(x => x.ShortCode == u);

            // if the short code does not exist, send back to home page
            if (shortenedUrl == null)
            {
                return View();
            }

            return Redirect(shortenedUrl.OriginalUrl);
        }
Setting Up The Client Side
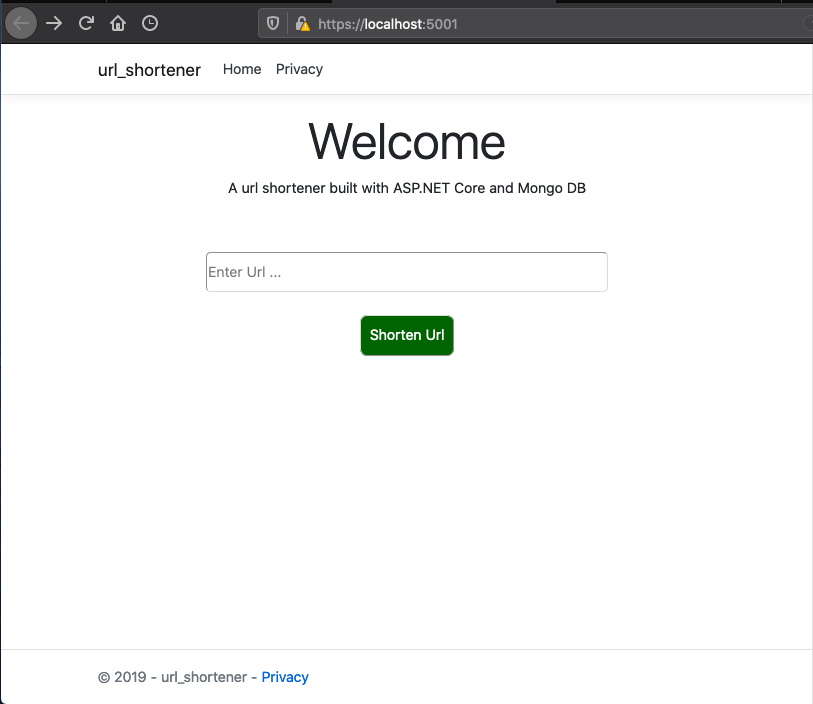
To receive the long url, we need to add an input control and a button to send the data to the server-side from. The home page is implemented as follows
@{
    ViewData["Title"] = "Home Page";
}

<div class="text-center">
    <h1 class="display-4">Welcome</h1>
    <p>A url shortener built with ASP.NET Core and Mongo DB</p>
</div>

<div style="width: 100%; margin-top: 60px;">
    <div style="width: 65%; margin-left: auto; margin-right: auto;">
        <form id="form" style="text-align: center;" asp-action="ShortenUrl" method="post">
            <input
                type="text"
                placeholder="Enter Url ..."
                style="width: 100%; border-radius: 5px; height: 45px;"
                name="longUrl"/>

            <button
                style="background-color: darkgreen; color: white; padding: 10px; margin-top: 25px; border-radius: 8px;"
                type="submit">
                Shorten Url
            </button>
        </form>
    </div>
</div>
To show the generated URL, we need a new view named ShortenUrl.cshtml with the following content under the Views directory
@model ShortenedUrl;

@{
    ViewData["Title"] = "Shortened Url";
}

<div style="width: 100%; padding: 30px;">
    <div>
        <div>Short Code: @Model.ShortCode</div>
        <div>Short Url: @Model.ShortUrl</div>
        <div>Long Url: @Model.OriginalUrl</div>
    </div>
</div>
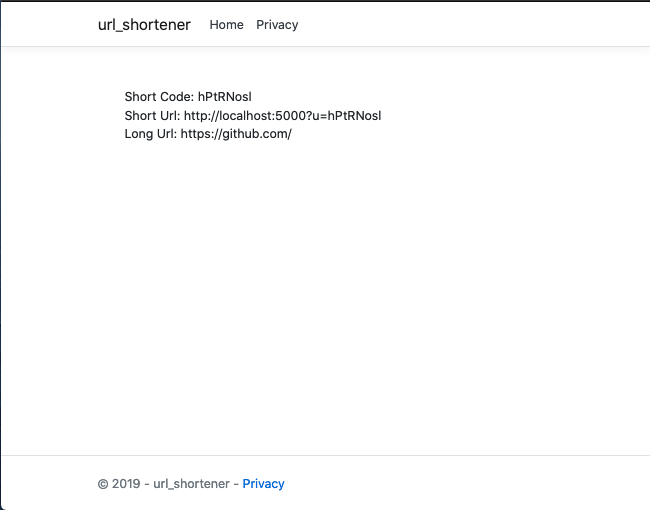
A sample URL generated response would look like
The entire source code for this article can be found here. In a follow-up article, we would benchmark the current implementation and take steps to improve performance.
Till the next one,
Adios
[HOW TO] Deploy your ASP.NET Core 1.x app to Heroku
7 years ago · 3 minutes read


For this tutorial, I’ll be using Elementary OS 0.4 Loki so the commands would be geared towards my system, but since elementary OS is based off Ubuntu, the same commands would work on Ubuntu. For those using Windows or Mac, I’m sure there are comparable commands for your platform.
Installing Ruby
To make use of the Heroku command line interface, you need to have Ruby installed on your system. So to install Ruby, some prerequisites must be installed and they can be using the following commands:
sudo apt-get update

sudo apt-get install git-core curl zlib1g-dev build-essential libssl-dev libreadline-dev libyaml-dev libsqlite3-dev sqlite3 libxml2-dev libxslt1-dev libcurl4-openssl-dev python-software-properties libffi-dev
After installing the prerequisites, we’ll install rvm which is the Ruby Version Manager. For that, we’ll install a few more prerequisites that are specific to rvm using the following command:
sudo apt-get install libgdbm-dev libncurses5-dev automake libtool bison libffi-dev
Next, we add the GNU projects’ GPG key to the keyring of your system to allow your system trust content gotten from their allied servers using the command:
gpg --keyserver hkp://keys.gnupg.net --recv-keys 409B6B1796C275462A1703113804BB82D39DC0E3
Next, we finally download and install the rvm using the commands below:
curl -sSL https://get.rvm.io | bash -s stable

source ~/.rvm/scripts/rvm

rvm install 2.3.1
Set the installed version as the default
rvm use 2.3.1 --default
Check the version of Ruby installed:
ruby -v
Installing Heroku
Both Windows and Mac OS have installers which can be gotten at https://devcenter.heroku.com/articles/heroku-command-line. But for Ubuntu or Elementary OS, run the following command which would get the debian package and install it:
wget -O- https://toolbelt.heroku.com/install-ubuntu.sh | sh
After it installs, you can verify your Heroku version with the command:
heroku --version
Heroku might prompt you to install the CLI which I did.
Next Steps
Next, you need to login to your Heroku account. And to do that you must have created an account on the Heroku website.After that is done, log in using the command:
heroku login
You’ll be prompted for your email address and password. Enter the appropriate values and wait for the success message telling you that you’re logged in.
Next, you create the build pack. There are some languages which Heroku supports by default and ASP.NET Core is not one of them. But trust the open source community to have created a solution which can be found at http://github.com/bolorundurowb/dotnetcore-buildpack.git. Create your build pack using the command:
heroku create --buildpack https://github.com/bolorundurowb/dotnetcore-buildpack#v1.1.5
Once that is done commit any changes you have made in your repo using the following commands:
git add *

git commit -m “”
Next, push your repo to Heroku using the command:
git push heroku master
If you get an error fatal: ‘heroku’ does not appear to be a git repository, run the following command:
heroku git:remote -a
If you get the error Failed to detect set buildpack https://github.com/bolorundurowb/dotnet-buildpack then make sure your local repo has a project.json file defined.
If everything goes well, you should see the following screen

Finally, run your new Heroku app using the command:
heroku open
Json Web Token (JWT) Authentication with ASP.NET Core 2.0
7 years ago · 4 minutes read
I recently was building a small web application and needed to add some authentication. For the .NET developer, the first thing that comes to mind is Identity but was that too heavy for my purposes. Having worked with Json Web Tokens (JWT) with NodeJS, they seemed to be the perfect fit for the job. They are simple, easy to implement, and for the most part, do a good job of securing your endpoint(s).
The wrong way
That said, I initially approached implementing token-based authentication the same way i had done it on Node which was a pretty terrible idea. I created middleware that sat on the HTTP request pipeline and for every request, I checked the route to see if it was to be protected and then proceeded to look for the token header, retrieve it, decode it and respond depending on the state of the token. That led to this abomination
    public class AuthenticationMiddleware
    {
        private readonly RequestDelegate _next;

        public AuthenticationMiddleware(RequestDelegate next)
        {
            _next = next;
        }

        public async Task Invoke(HttpContext context)
        {
            if (context.Request.Path.Value.Contains("notes"))
            {
                string token = context.Request.Headers["x-access-token"];
                if (token == null)
                {
                    context.Response.StatusCode = 401;
                    await context.Response.WriteAsync("Sorry, a token is required to access this route.");
                    return;
                }

                try
                {
                    var json = Helpers.DecodeToken(token);
                    context.Items["id"] = json["id"];
                    await _next.Invoke(context);
                    return;
                }
                catch (TokenExpiredException)
                {
                    context.Response.StatusCode = 401;
                    await context.Response.WriteAsync("Sorry, your token is expired. Please login.");
                    return;
                }
                catch (SignatureVerificationException)
                {
                    context.Response.StatusCode = 401;
                    await context.Response.WriteAsync("Sorry, this token has an invalid signature.");
                    return;
                }
                catch (ArgumentException)
                {
                    context.Response.StatusCode = 401;
                    await context.Response.WriteAsync("Sorry, this token is corrupted.");
                    return;
                }
            }

            await _next.Invoke(context);
        }
    }

    public static class AuthenticationMiddlewareExtensions
    {
        public static IApplicationBuilder UseAuthenticationMiddleware(this IApplicationBuilder app)
        {
            return app.UseMiddlewarelt;AuthenticationMiddlewaregt;();
        }
    }
Somewhere at the back of my mind, I knew this couldn’t be the right way. So off I went to do some research and it turns out I was right, there is a better way.
The right way
This tutorial makes a whole lot of assumptions. First, you know what Json Web Tokens are. If you don’t, then this scotch.io article would do you a whole world of good. Second, you are familiar with the C# language, .NET Core and the ASP.NET Core framework. if you are not familiar with them, this, this and this would help you get up to speed. Third, you have an ASP.NET Core application. Finally, you have a system of verifying if a user is valid or not.
That said, we need to create a static method called GenerateAuthToken that would help us generate the authentication token (static so as to enable it be called from any class without instantiation). You can place the method in any existing class or create a class for that purpose. The method should look something like this. This sample takes a userId as the token payload.
    internal static string GenerateAuthToken(string userId)
    {
        var claims = new[]
        {
            new Claim(JwtRegisteredClaimNames.Sub, userId),
            new Claim(JwtRegisteredClaimNames.Jti, Guid.NewGuid().ToString())
        };

        var token = new JwtSecurityToken
        (
            "the issuer (change please)",
            "your audience (change please)",
            claims,
            expires: DateTime.UtcNow.AddDays(30),
            notBefore: DateTime.UtcNow,
            signingCredentials: new SigningCredentials(
                new SymmetricSecurityKey(Encoding.UTF8.GetBytes("The security key (change please)")),
                SecurityAlgorithms.HmacSha256)
        );
        return new JwtSecurityTokenHandler().WriteToken(token);
    }
Once you are done verifying a user’s validity with a check against a database or by any other means, proceed to call the GenerateAuthToken method with the userId as a parameter. Something like this:
var token = GenerateAuthToken("sampleId");
A token would be retruned that looks something like this:
eyJhbGciOiJIUzI1NiIsInR5cCI6IkpXVCJ9.eyJpc3MiOiJ0b3B0YWwuY29tIiwiZXhwIjoxNDI2NDIwODAwLCJodHRwOi8vdG9wdGFsLmNvbS9qd3RfY2xhaW1zL2lzX2FkbWluIjp0cnVlLCJjb21wYW55IjoiVG9wdGFsIiwiYXdlc29tZSI6dHJ1ZX0.yRQYnWzskCZUxPwaQupWkiUzKELZ49eM7oWxAQK_ZXw
Next, to verify the user token when a request is made to the API, we need to configure the request pipeline. Add this to the <span class="pl-en">ConfigureServices</span> method in the Startup.cs file of your project to handle verifying the token:
// add authentication
services.AddAuthentication(JwtBearerDefaults.AuthenticationScheme)
.AddJwtBearer(jwtBearerOptions =&gt;
{
jwtBearerOptions.TokenValidationParameters = new TokenValidationParameters
{
ValidateActor = true,
ValidateAudience = true,
ValidateLifetime = true,
ValidateIssuerSigningKey = true,
ValidIssuer = "the issuer (please change)",
ValidAudience = "your audience (please change)",
IssuerSigningKey = new SymmetricSecurityKey(Encoding.UTF8.GetBytes("a secret (please change)"))
};
});
Add the code below to the Configure method of your Startup.cs file. It adds the authentication middleware to the request pipeline.
app.UseAuthentication();
Finally, to protect any controller or controller method, just add the Authorize attribute to the controller or controller method. That protects it from unauthorized access. if no token is present on the request or the token is invalid, a 401 response is returned.
PS: The JWT Bearer system expects the header to be in the format,
Authorization: Bearer .
Hopefully, this helps someone on their way to building the next big thing.
Till the next one.
Cheers.
Getting Started With ASP.NET Core (Part 1)
7 years ago · 3 minutes read
ASP.NET Core is the new direction that Microsoft is taking their web technologies. It is still in its early stages but is showing a lot of promise. Between versions 1.0 and 1.1, the Kestrel server has shown significant speed improvements. ASP.NET Core is a significant departure from the previous generation of ASP.NET in that it was (and currently is) a community-driven and developed project whose source code can be found on GitHub. ASP.NET Core also has the advantage of being very modular, this means that it can be run on IIS Servers, or the newer, lighter Kestrel Server. Another advantage ASP.NET Core has is that it shares a single set of libraries for creating Web API and Web applications. The most important advantage is that unlike traditional ASP.NET, ASP.NET Core is fully cross-platform.
At the end of this tutorial, we’ll create a full-fledged Notes application and deploy it to Heroku, but for this part, we’ll start with a basic application which would show “Hello World” in the browser.
We would be using the ASP .NET Core yeoman generator to spin up our web application. If you don’t have the ASP .NET Core generator, you can install it via npm. The following dependencies are required:
.NET Core SDK which can be gotten from here
Node JS which can be gotten from here
Yeoman which can be installed by running
npm install -g yoBower which can be installed by running
$ npm install -g bowerASP .NET yeoman generator by running
$ npm install -g generator-aspnet
Once you’re all set, run the following command;
$ yo aspnet
You should see the following screen;
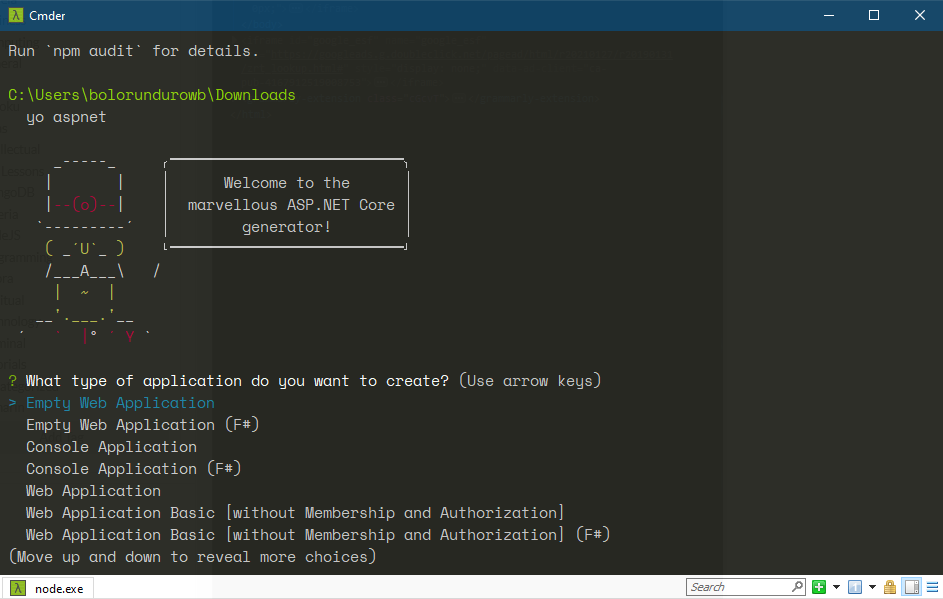
Select the “Empty Web Application” option using the up and down arrow keys and accept with the Enter key.
Set your app name, for this tutorial, we’ll use cookieauth.
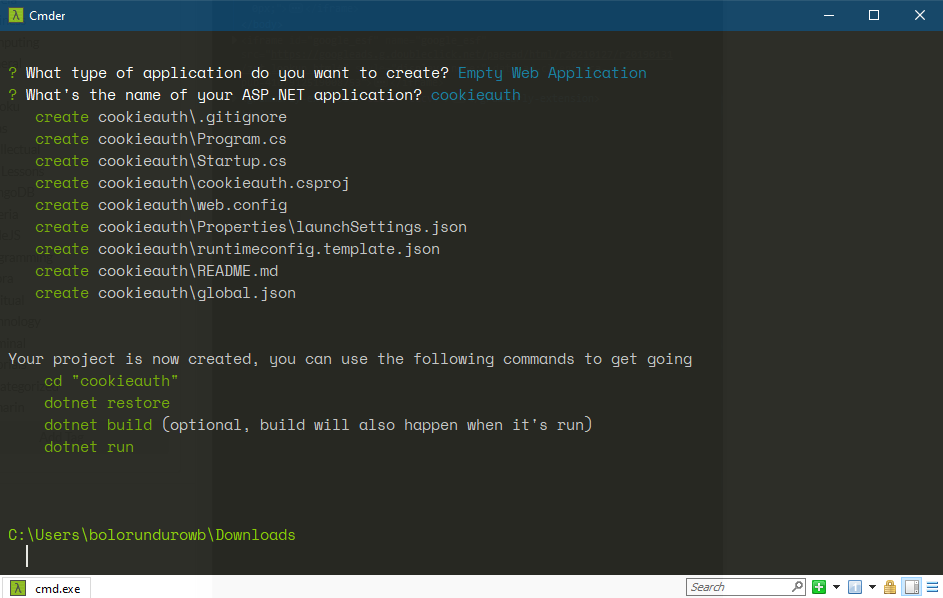
After that, a set of files would be created in the folder cookieauth
Next change directory to the cookieauth folder using:
$ cd cookieauth
Run the commands
$ dotnet restore
To get all required libraries from Nuget
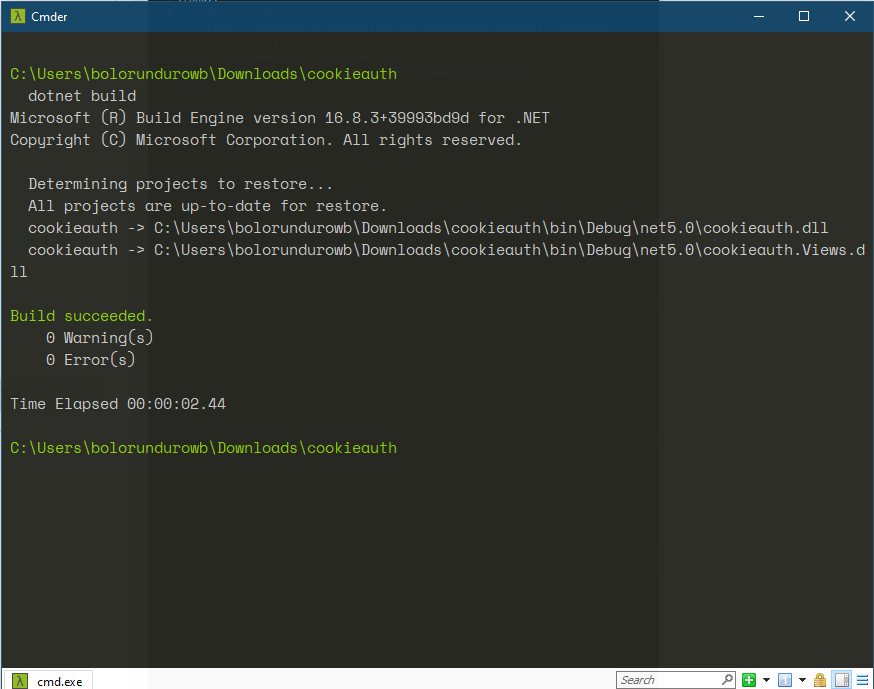
$ dotnet build
To compile the existing code to an executable
$ dotnet run
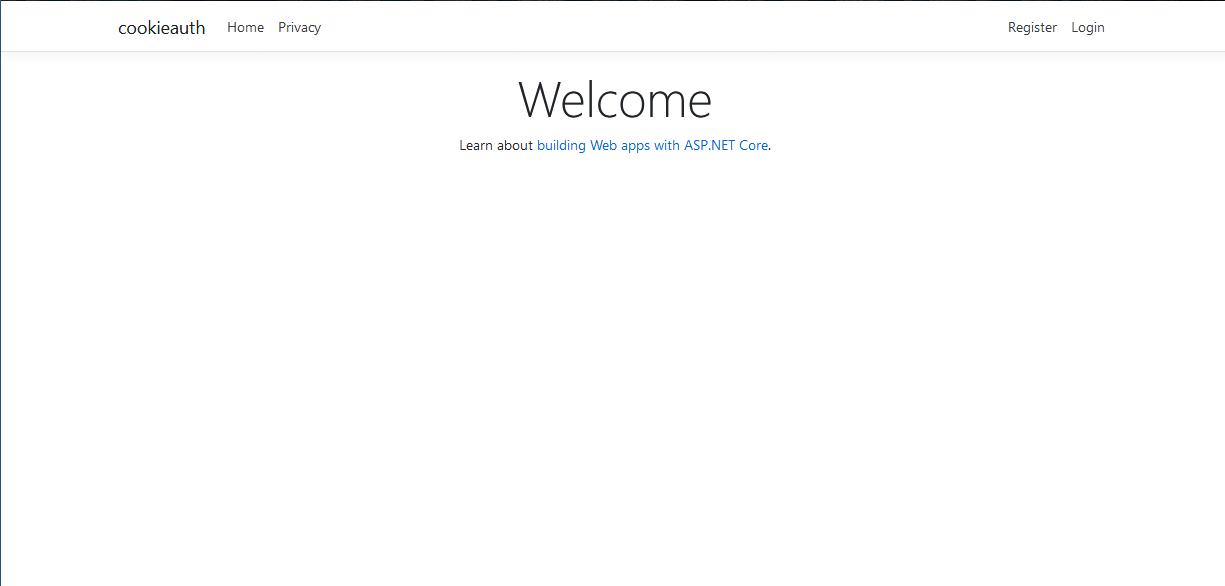
This would run the empty app on the default port (5000) and can be accessed via the URL http://localhost:5000
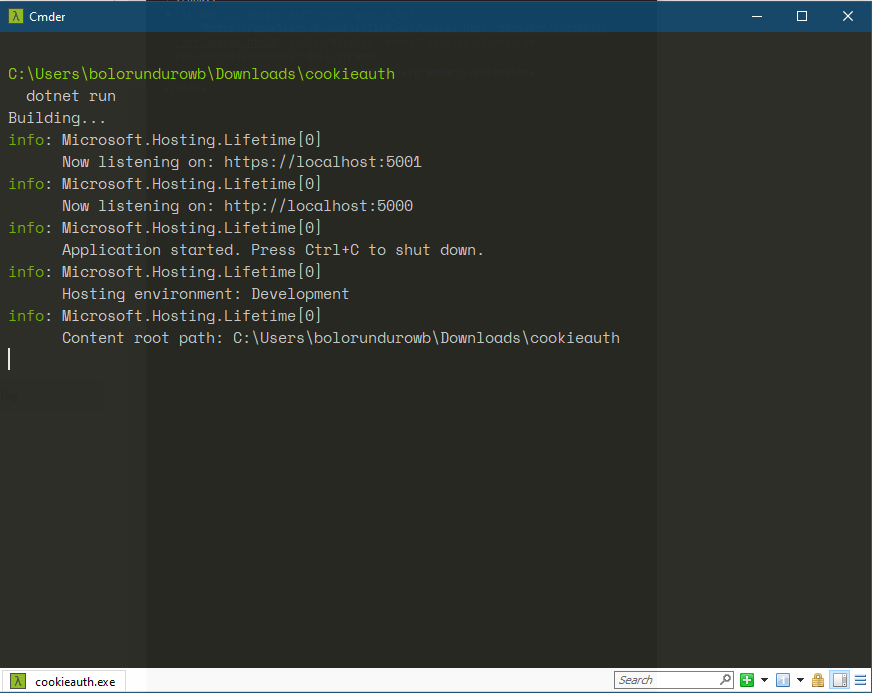
If you visit HTTP://localhost:5000 in your browser, you should see
That would be it, for this. Check out the next tutorial in this series.
Cheers